In order to use infrastructure as code for your Azure solutions, we will use Azure Resource Manager templates. The template is a JSON file.
Tools Needed
We will use Visual Studo Code (VsCode) for our Arm template development
You also need either Azure PowerShell or Azure CLI to deploy the template. For the installation instructions, see:
Make sure you need to sign in to Azure thru PowerShell.
- Open Visual Studio Code with the Resource Manager Tools extension installed.
- From the File menu, select New File to create a new file.
- From the File menu, select Save as.
- Name the file azuredeploy and select the JSON file extension. The complete name of the file azuredeploy.json.
- Save the file to your workstation. Select a path that is easy to remember because you’ll provide that path later when deploying the template.
- Copy and paste the following JSON into the file:
{
  "$schema": "https://schema.management.azure.com/schemas/2015-01-01/deploymentTemplate.json#",
  "contentVersion": "1.0.0.0",
  "resources": []
}
Here’s what your VS Code environment looks like:
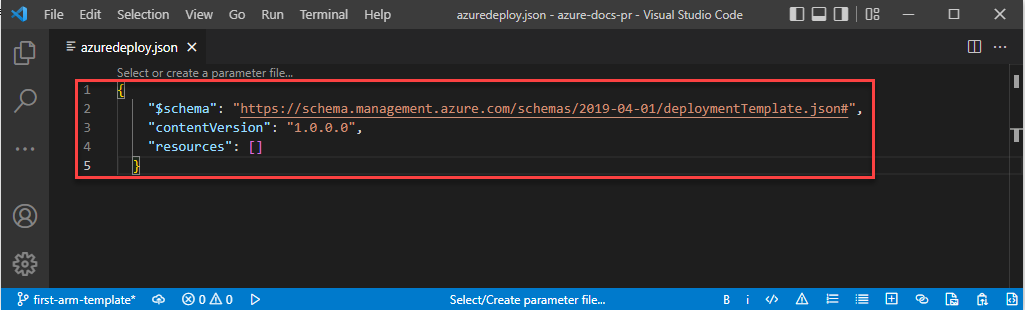
- Save the file.
Congratulations, you’ve created your first template.
Sign in to Azure
To start working with Azure PowerShell/Azure CLI, sign in with your Azure credentials.
Connect-AzAccount
Create resource group
When you deploy a template, you specify a resource group that will contain the resources. Before running the deployment command, create the resource group with either Azure CLI or Azure PowerShell. Select the tabs in the following code section to choose between Azure PowerShell and Azure CLI. The CLI examples in this article are written for the Bash shell.
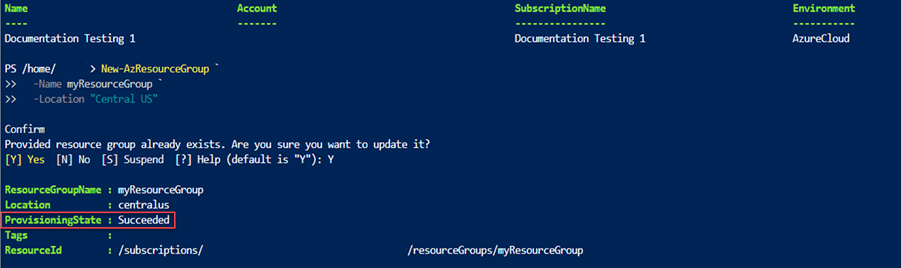
New-AzResourceGroup `
  -Name myResourceGroup `
  -Location "Central US"
Deploy template
You can deploy arm template using Powershell or Az CLI
$templateFile = "{provide-the-path-to-the-template-file}"
New-AzResourceGroupDeployment `
  -Name blanktemplate `
  -ResourceGroupName myResourceGroup `
  -TemplateFile $templateFile
The deployment command returns results. Look for ProvisioningState to see whether the deployment succeeded.
Verify deployment
You can verify the deployment by exploring the resource group from the Azure portal.
- Sign in to the Azure portal.
- From the left menu, select Resource groups.
- Select the resource group deploy in the last procedure. The default name is myResourceGroup. You shall see no resource deployed within the resource group.
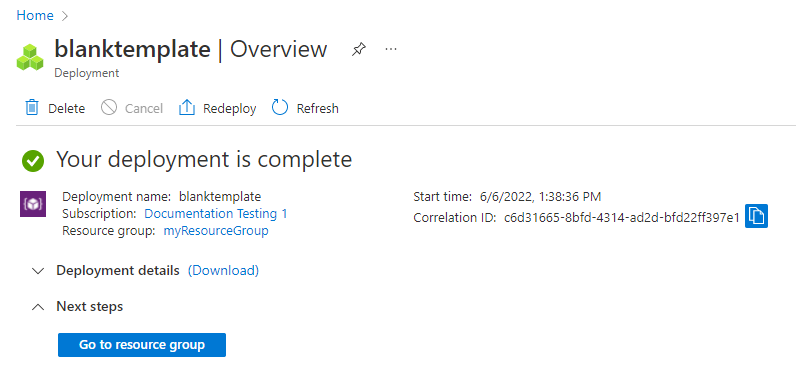
- Notice in the upper right of the overview, the status of the deployment is displayed. Select 1 Succeeded.

- You see a history of deployment for the resource group. Select blanktemplate.
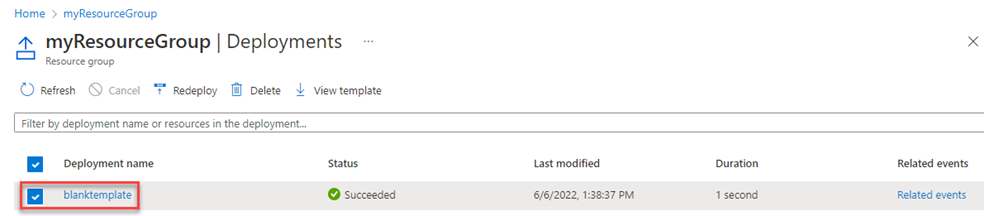
- You see a summary of the deployment. In this case, there’s not a lot to see because no resources were deployed. Later in this series you might find it helpful to review the summary in the deployment history. Notice on the left you can view inputs, outputs, and the template used during deployment.