This article introduces the features that are available in the Technical Preview for Configuration Manager, version 1806. You can install this version to update and add new capabilities to your technical preview site.
Review the Technical Preview article before installing this update. That article familiarizes you with the general requirements and limitations for using a technical preview, how to update between versions, and how to provide feedback.
Known Issues in this Technical Preview
Site fails to upgrade with remote content library
The site fails to upgrade with the following errors in cmupdate.log:
Failed to find any valid drives
GetContentLibraryParameters failed; 0x80070057
ERROR: Failed to process configuration manager update.
This issue occurs in this release when the content library is in a remote location.
Workaround
Move the content library to a drive local to the site server. For more information, see Configure a remote content library for the site server.
The following are new features you can try out with this version.
Third-party software updates
This release further iterates on support for third-party software updates as a result of your UserVoice feedback. You no longer require the use of System Center Updates Publisher (SCUP) for some common scenarios. The new Third-Party Software Update Catalogs node in the Configuration Manager console allows you to subscribe to third-party catalogs, publish their updates to your software update point, and then deploy them to clients.
The following third-party software update catalogs are available in this release:
| Publisher | Catalog Name |
|---|---|
| HP | HP Client Updates Catalog |
SCUP continues to support other catalogs and scenarios. The list of catalogs in the Third-Party Software Update Catalogs node of the Configuration Manager console is dynamic, and will be updated as additional catalogs are available and supported.
Prerequisites
- Set up software updates management, with an HTTPS-enabled software update point. For more information, see Prepare for software updates management.
- The software update point must be on the site server for this feature in this release.
Tip
The software update point requires HTTPS because it’s a requirement for the WSUS APIs used to handle signing certificates. Clients don’t need to be HTTPS-enabled as well. For more information on enabling HTTPS on WSUS, see the following articles for assistance:
- The software update point must be on the site server for this feature in this release.
- Sufficient disk space on the software update point, WSUSContent folder, to store the source binary content for third-party software updates. The amount of required storage varies based on the vendor, types of updates, and specific updates that you publish for deployment. If you need to move the WSUSContent folder to another drive with more free space, see the WSUS support team blog post How to change the location where WSUS stores updates locally.
- Enable and deploy the client setting Enable third party software updates in the Software Updates group.
- The site server requires internet access to download.microsoft.com over HTTPS port 443. The third-party software update synchronization service currently runs on the site server. This service updates the list of available third-party catalogs, downloads the catalogs when you subscribe, and downloads the updates when published. Configure internet proxy settings, if necessary, on the Proxy tab of the Site System role properties of the site server computer.
Try it out!
Try to complete the tasks. Then send Feedback letting us know how it worked.
Phase 1: Enable and set up the feature
Perform the following steps once per hierarchy to enable and set up the feature for use:
- In the Configuration Manager console, go to the Administration workspace. Expand Site Configuration, and select the Sites node.
- Select the top-level site in the hierarchy. In the ribbon, click Configure Site Components, and select Software Update Point.
- Switch to the Third Party Updates tab. Select the option to Enable third-party software updates. For more information on the certificate options, see Improvements for enabling third-party software update support.
Note
If you use the default option for Configuration Manager to manage this certificate, a new certificate of type Third-party WSUS Signing is created in the Certificates node under Security in the Administration workspace.
Phase 2: Subscribe to a third-party catalog and sync updates
Perform the following steps for each third-party catalog to which you want to subscribe:
- In the Configuration Manager console, go to the Software Library workspace. Expand Software Updates and select the Third-Party Software Update Catalogs node.
- Select the catalog to subscribe, and click Subscribe to Catalog in the ribbon.
- Review and approve the catalog certificate.
Note
When you subscribe to a third-party software update catalog, the certificate that you review and approve in the wizard is added to the site. This certificate is of type Third-party Software Updates Catalog. You can manage it from the Certificates node under Security in the Administration workspace.
- Complete the wizard.
Tip
After initial subscription, the catalog should start to download immediately. It then resyncs every 24 hours in this release. If you don’t want to wait for the catalog to automatically download, click Sync now in the ribbon.
After the catalog is downloaded, the product metadata must be synchronized to the software update point. For more information on this process as well as how to manually initiate, see Synchronize software updates. At this point, you can see the third-party updates in the All Updates node.
- Next, configure the software update point Products for the third-party catalog to which you subscribed. For more information, see Configure classifications and products to synchronize. After the product criteria changes, software update synchronization must occur again.
Before you can see compliance results from clients, they need to scan and evaluate updates. You can manually trigger this cycle from the Configuration Manager control panel on a client by running the Software Updates Scan Cycle action. For more information on the process, see Software updates introduction.
Phase 3: Deploy third-party software updates
Perform the following steps for any third-party software updates you want to deploy to clients:
- In the Configuration Manager console, go to the Software Library workspace. Expand Software Updates and select the All Software Updatesnode.
Tip
Click Add Criteria to filter the list of updates. For example, add Vendor for Adobe Systems, Inc. to view all updates from Adobe.
- Select the updates that are required by clients. Click Publish Third-Party Software Update Content and review progress in the SMS_ISVUPDATES_SYNCAGENT.log. This action downloads the update binaries from the vendor, and stores them in the WSUSContent folder on the software update point. It also changes the state of the update from metadata-only to with content and deployable.
Note
When you publish third-party software update content, any certificates used to sign the content are added to the site. These certificates are of type Third-party Software Updates Content. You can manage them from the Certificates node under Security in the Administrationworkspace.
- Deploy the updates using the existing software updates management process. For more information, see Deploy software updates. On the Download Locations page of the Deploy Software Updates Wizard, select the default option to Download software updates from the internet. In this scenario, the content is already published to the software update point, which is used to download the content for the deployment package.
Monitoring progress of third-party software updates
Synchronization of third-party software updates is handled by the SMS_ISVUPDATES_SYNCAGENT component on the site server. You can view status messages from this component, or see more detailed status in the SMS_ISVUPDATES_SYNCAGENT.log. This log is on the site server in the Logssubfolder of the site installation directory. By default this path is C:\Program Files\Microsoft Configuration Manager\Logs. For more information on monitoring the general software update management process, see Monitor software updates.
Known issues
- The third-party software update synchronization service doesn’t support the software update point configured to use a WSUS Server Connection Account. If this account is configured on the Proxy and Account Settings tab of the Software update point Properties page, you’ll see the following error in the SMS_ISVUPDATES_SYNCAGENT.log:
WSUS access account appears to be configured, it is not yet supported for third party updates sync.
For more information on this account, see Software Update Point Connection Account. - Don’t mix the use of other tools such as SCUP with this new integrated third-party software update feature. The third-party software update synchronization service can’t publish content to metadata-only updates that were added to WSUS by another application, tool, or script, such as SCUP. The Publish third-party software update content action fails on these updates. If you need to deploy third-party updates that this feature doesn’t yet support, use your existing process in full for deploying those updates.
Configure Windows Defender SmartScreen settings for Microsoft Edge
This release adds three settings for Windows Defender SmartScreen to the Microsoft Edge browser compliance settings policy. The policy now includes the following additional settings on the SmartScreen Settings page:
- Allow SmartScreen: Specifies whether Windows Defender SmartScreen is allowed. For more information, see the AllowSmartScreen browser policy.
- Users can override SmartScreen prompt for sites: Specifies whether users can override the Windows Defender SmartScreen Filter warnings about potentially malicious websites. For more information, see the PreventSmartScreenPromptOverride browser policy.
- Users can override SmartScreen prompt for files: Specifies whether users can override the Windows Defender SmartScreen Filter warnings about downloading unverified files. For more information, see the PreventSmartScreenPromptOverrideForFiles browser policy.
Sync MDM policy from Microsoft Intune for a co-managed device
Starting in this release when you switch a co-management workload, the co-managed devices automatically synchronize MDM policy from Microsoft Intune. This sync also happens when you initiate the Download Computer Policy action from Client Notifications in the Configuration Manager console. For more information, see Initiate client policy retrieval using client notification.
Transition Office 365 workload to Intune using co-management
You can now transition the Office 365 workload from Configuration Manager to Microsoft Intune after enabling co-management. To transition this workload, go to the co-management properties page and move the slider bar from Configuration Manager to Pilot or All. For more information, see Co-management for Windows 10 devices.
There is also a new global condition, Are Office 365 applications managed by Intune on the device. This condition is added by default as a requirement to new Office 365 applications. When you transition this workload, co-managed clients don’t meet the requirement on the application, thus don’t install Office 365 deployed via Configuration Manager.
Known issue
- This workload transition currently only applies to Office 365 deployments. Configuration Manager continues to manage Office 365 updates. For more information including a possible workaround, see the Configuration Manager version 1802 release note Changing Office 365 client setting doesn’t apply.
Package Conversion Manager
Package Conversion Manager is now an integrated tool that allows you to convert legacy Configuration Manager 2007 packages into Configuration Manager current branch applications. Then you can use features of applications such as dependencies, requirement rules, and user device affinity.
Tip
Legacy documentation for the existing functionality in Package Conversion Manager is available on TechNet. Relevant information is in process to migrate to the docs.microsoft.com library.
Try it out!
Try to complete the tasks. Then send Feedback letting us know how it worked.
Important
If you previously installed an older version of Package Conversion Manager, first uninstall it before upgrading your site. The new integrated version doesn’t require installation, but may conflict with existing versions.
- In the Configuration Manager console, go to the Software Library workspace. Expand Application Management and select Packages.
- Select a package. The following three options are available in the Package Conversion group of the ribbon:
- Analyze Package: Start the conversion process by analyzing the package.
- Convert Package: Some packages can easily be converted into applications with this action.
- Fix and Convert: Some packages require issues to be fixed before converting into applications.
For more information on these actions, see How to Analyze and Convert Packages.
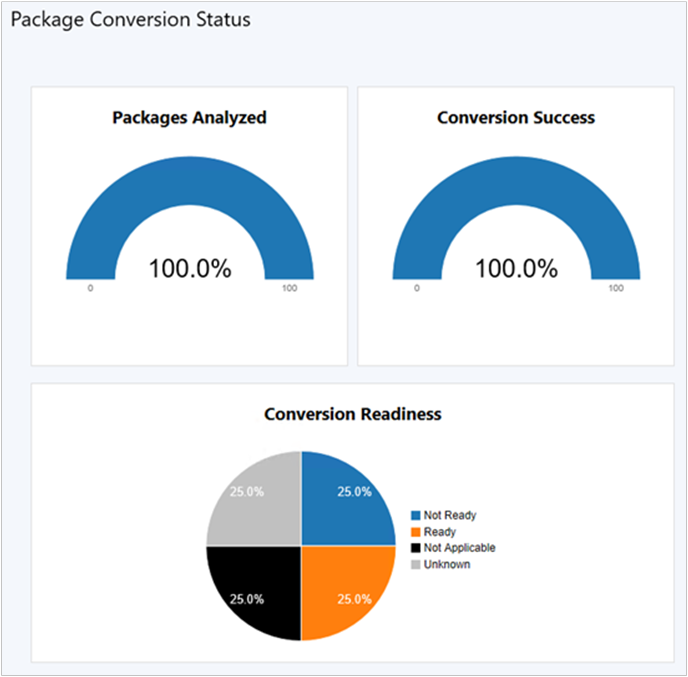
- Go to the Monitoring workspace and select Package Conversion Status. This new dashboard shows the overall analysis and conversion state of packages in the site. A new background task automatically summarizes the analysis data.
Tip
Package Conversion Manager doesn’t require you to schedule analysis of packages. This action is now handled by the integrated summarization task.
Deploy software updates without content
You can now deploy software updates to devices without first downloading and distributing software update content to distribution points. This feature is beneficial when dealing with extremely large update content, or when you always want clients to get content from the Microsoft Update cloud service. Clients in this scenario can also download content from peers that already have the necessary content. The Configuration Manager client continues to manage the content download, thus can utilize the Configuration Manager peer cache feature, or other technologies such as Delivery Optimization. This feature supports any update type supported by Configuration Manager software updates management, including Windows and Office updates.
Try it out!
Try to complete the tasks. Then send Feedback letting us know how it worked.
- Start a software update deployment per normal. For more information, see Deploy software updates.
- In the Deploy Software Updates Wizard, on the Deployment Package page, select the new option for No deployment package.
Known issues
- The icon for an update deployed with this setting incorrectly displays with a red X as if the update is invalid. For more information, see Icons used for software updates.
- This setting is only integrated with the Deploy Software Updates Wizard. It isn’t currently available with automatic deployment rules.
Office Customization Tool integration with the Office 365 Installer
The Office Customization Tool is now integrated with the Office 365 Installer in the Configuration Manager console. When creating a deployment for Office 365, you can now dynamically configure the latest Office manageability settings. The Office Customization Tool is updated at the same time as the release of new builds of Office 365. You can now take advantage of new manageability settings in Office 365 as soon as they are available.
Prerequisites
- The computer running the Configuration Manager console needs internet access via HTTPS port 443. The Office 365 Client Installation Wizard uses a Windows standard web browser API to open https://config.office.com. If an internet proxy is used, the user must be able to access this URL.
Try it out!
Try to complete the tasks. Then send Feedback letting us know how it worked.
- In the Configuration Manager console, go to the Software Library workspace, and select the Office 365 Client Management node.
- Click the Office 365 Installer tile in the dashboard to launch the Office 365 Client Installation Wizard. For more information, see Deploy Office 365 apps.
- On the Office Setting page, click Go To Office Web Page. Use the online Office Customization Tool to specify settings for this deployment.
- Click Submit in the upper right corner when complete. Finish the Office 365 Client Installation Wizard.
Improvements to cloud management gateway
This release includes the following improvements to the cloud management gateway (CMG):
Simplified client bootstrap command line
When installing the Configuration Manager client on the internet via a CMG, fewer command-line properties are now required. For more information on one example of this scenario, see the Command line to install Configuration Manager client when preparing for co-management.
The following command-line properties are required in all scenarios:
- CCMHOSTNAME
- SMSSITECODE
The following properties are required when using Azure AD for client authentication instead of PKI-based client authentication certificates:
- AADCLIENTAPPID
- AADRESOURCEURI
The following property is required if the client will roam back to the intranet:
- SMSMP
The following example includes all of the above properties:
ccmsetup.exe CCMHOSTNAME=CONTOSO.CLOUDAPP.NET/CCM_Proxy_MutualAuth/72186325152220500 SMSSiteCode=ABC AADCLIENTAPPID=7506ee10-f7ec-415a-b415-cd3d58790d97 AADRESOURCEURI=https://contososerver SMSMP=https://mp1.contoso.com
For more information, see Client installation properties.
Download content from a CMG
Previously, you had to deploy a cloud distribution point and CMG as separate roles. Now in this release, a CMG can also serve content to clients. This functionality reduces the required certificates and cost of Azure VMs. To enable this feature, enable the new option to Allow CMG to function as a cloud distribution point and serve content from Azure storage on the Settings tab of the CMG properties.
Trusted root certificate isn’t required with Azure AD
When you create a CMG, you’re no longer required to provide a trusted root certificate on the Settings page. This certificate isn’t required when using Azure Active Directory (Azure AD) for client authentication, but used to be required in the wizard.
Important
If you’re using PKI client authentication certificates, then you still must add a trusted root certificate to the CMG.
Improvements to secure client communications
This release continues to iterate on improved secure client communications by removing additional dependencies on the network access account. When you enable the new site option to Use Configuration Manager-generated certificates for HTTP site systems, the following scenarios don’t require a network access account to download content from a distribution point:
- Task sequences running from boot media or PXE
- Task sequences running from Software Center
These task sequences can be for OS deployment or custom. It is also supported for workgroup computers.
Software Center infrastructure improvements
Application catalog roles are no longer required to display user-available applications in Software Center. This change helps you reduce the server infrastructure required to deliver applications to users. Software Center now relies upon the management point to obtain this information, which helps larger environments scale better by assigning them to boundary groups.
Try it out!
Try to complete the tasks. Then send Feedback letting us know how it worked.
- Remove all application catalog roles from the site. These roles include the application catalog web service point and the application catalog website point.
- Deploy an application as available to a user collection.
- Use Software Center as a targeted user to browse for, request, and install the application.
Known issue
- If you use an Azure Active Directory-joined client with this feature, don’t configure the site to Use Configuration Manager-generated certificates for HTTP site systems. It currently conflicts with this feature. For more information on this setting, see improved secure client communications.
Provision Windows app packages for all users on a device
You can now provision an application with a Windows app package for all users on the device. One common example of this scenario is provisioning an app from the Microsoft Store for Business and Education, like Minecraft: Education Edition, to all devices used by students in a school. Previously, Configuration Manager only supported installing these applications per user. After signing in to a new device, a student would have to wait to access an app. Now when the app is provisioned to the device for all users, they can be productive more quickly.
Important
Be careful with installing, provisioning, and updating different versions of the same Windows app package on a device, which may cause unexpected results. This behavior may occur when using Configuration Manager to provision the app, but then allowing users to update the app from the Microsoft Store. For more information, see the next step guidance when you Manage apps from the Microsoft Store for Business.
When provisioning an offline licensed app, Configuration Manager doesn’t allow Windows to automatically update it from the Microsoft Store.
Try it out!
Try to complete the tasks. Then send Feedback letting us know how it worked.
- Create a new application. This app must be from a Windows app package, or an offline-licensed app, which you’ve synchronized from the Microsoft Store for Business and Education.
- On the General Information page of the Create Application Wizard, enable the option to Provision this application for all users on the device.
Tip
If you are modifying an existing application, this setting is on the User Experience tab of the application properties.
- Deploy the application to a device collection.
- Sign in to a targeted device with different user accounts and launch the application.
Note
If you need to uninstall a provisioned application from devices to which users have already signed on, you need to create two uninstall deployments. Target the first uninstall deployment to a device collection that contains the devices. Target the second uninstall deployment to a user collection that contains the users who have already signed on to devices with the provisioned application. When uninstalling a provisioned app on a device, Windows currently doesn’t uninstall that app for users as well.
Improvements to the Surface dashboard
This release includes the following improvements to the Surface dashboard:
- The Surface dashboard now displays a list of relevant devices when graph sections are selected.
- Clicking on the Percent of Surface Devices tile opens a list of Surface devices.
- Clicking on a bar in the Top Five Firmware Versions tile opens a list of Surface devices with that specific firmware version.
- When viewing these device lists from the Surface dashboard, you can right-click a device and perform common actions.
Hardware inventory default unit revision
In Configuration Manager version 1710, the default unit used in many reporting views changed from megabytes (MB) to gigabytes (GB). Due to improvements to hardware inventory for large integer values, and based on customer feedback, this default unit is now MB again.
Sources:
Capabilities in Technical Preview 1806 for SCCM CB – here